Mechanic / Crystal PvP / Intermediate
Learn how to double hand, re-totem after a pop, organize your inventory and restore Totem protection before the next burst in Crystal PvP.
Crystal PvPIntermediate16 min readJavaVerified Aug 27, 2026
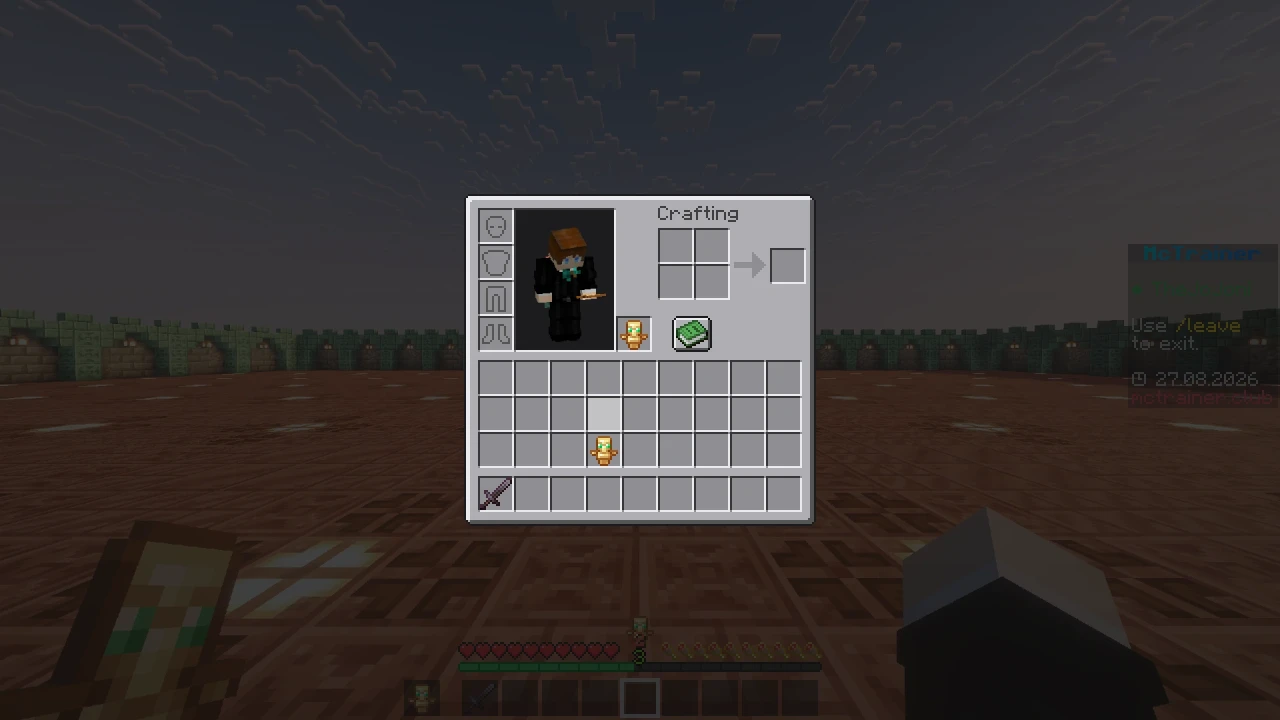
The Totem of Undying can prevent one lethal hit, but in Crystal PvP, surviving the first hit is often not enough.
A strong opponent can create another lethal damage window almost immediately. If the first Totem pops and Player 1 has no second Totem active, the time spent opening the inventory, finding a Totem and restoring protection can become the exact window Player 2 needs to secure another pop or a kill.
Totem Management is the process of keeping Totem protection available before, during and immediately after those damage windows.
In this guide, Player 1 refers to the player managing their Totems and Player 2 refers to the opponent.
The core skills are:
These principles are especially important in Crystal PvP, where techniques such as D-Tap are designed to create rapid consecutive Totem pops.
A Totem only protects Player 1 while it is held in the main hand or offhand.
A Totem sitting elsewhere in the inventory is only a reserve. A Totem in the hotbar is also only a reserve until that hotbar slot is selected.
This creates three useful protection states:
Practice this on MCTrainer
Open the matching training or platform area while this guide is fresh.
Related guides based on the learning path, explicit relationships, and matching topic metadata.
| State | Main hand | Offhand | Purpose |
|---|
| Normal combat | Sword, crystal, block or other combat item | Totem | Stay protected while keeping normal offensive options |
| Double handed | Totem | Totem | Prepare for rapid lethal damage or a possible double-pop |
| Refill | Inventory open / Totem being moved | Totem or empty | Restore the missing active Totem as quickly as possible |
The basic Totem Management cycle is:
Fight normally → recognize danger → double hand → survive the pop → re-totem → restore the preferred combat state
The important part is that Player 1 does not wait until after every pop to begin thinking about the next Totem.
Good Totem Management prepares the next layer of protection before it is needed.
Player 1 should keep a Totem on a consistent, quickly reachable hotbar slot.
The Hotbar Totem has two different jobs.
First, it is the Totem Player 1 can select to double hand without opening the inventory.
Second, after the Hotbar Totem has been consumed, its fixed slot gives Player 1 a predictable target when refilling from the inventory.
For example, if Player 1 always keeps the Hotbar Totem on the same key, the sequence can become:
Open inventory → hover Totem → press Totem hotbar key → close inventory
There is no need to drag the Totem manually into the slot.
The exact key does not matter as much as consistency.
A useful Totem key should:
Player 1 should avoid relying on the scroll wheel to find the Totem during an emergency. A direct hotkey is more predictable and removes the possibility of scrolling past the required slot.
Double handing means holding one Totem in the main hand and another Totem in the offhand.
In normal Crystal PvP, Player 1 usually wants the main hand available for a sword, End Crystal, Obsidian or another combat item.
That changes when the risk of dying to the next burst becomes more important than continuing the current offensive action.
Player 1 can then select the Hotbar Totem.
The protection state becomes:
Main hand Totem + Offhand Totem
Because Java Edition uses the main-hand Totem first, a lethal hit consumes the Hotbar Totem while leaving the offhand Totem active.
Player 1 therefore remains protected against another lethal hit without needing to complete an inventory refill between the two Totem activations.
This is particularly important against techniques that create damage across consecutive windows.
A D-Tap, for example, is specifically designed to create two rapid crystal damage instances. If Player 1 is holding only one Totem, the first explosion can consume it and leave Player 1 vulnerable to the second.
Double handing reduces that vulnerability by having the second Totem active before the first one pops.
Double handing is powerful, but it should not be treated as the permanent default.
Selecting the Hotbar Totem also means Player 1 is temporarily giving up the normal main-hand item.
That can reduce Player 1's ability to:
The decision is therefore a tradeoff between immediate safety and available combat options.
Player 1 should consider double handing when the chance of receiving lethal burst damage becomes high.
Common examples include:
Player 1 can return to the normal combat item once the immediate danger has passed.
The goal is not to double hand for as long as possible.
The goal is to recognize the moments where being ready for two lethal hits is more valuable than keeping the normal main-hand item selected.
After a Totem is consumed, Player 1 needs to restore the missing protection.
This is usually called re-toteming.
There are two important refill targets.
Offhand Refill
If the offhand Totem has been consumed, Player 1 can open the inventory, hover a reserve Totem and use the Swap Item With Offhand key.
With the default keybind, this is commonly F.
The basic sequence is:
Open inventory → hover Totem → offhand key → close inventory
Hotbar Refill
If the Hotbar Totem has been consumed, Player 1 can hover a reserve Totem and press the number or custom key bound to the Totem's hotbar slot.
The sequence becomes:
Open inventory → hover Totem → Hotbar Totem key → close inventory
Both methods avoid manually dragging the item.
The faster Player 1 can identify the missing protection and execute the correct hotkey, the shorter the vulnerable refill window becomes.
Not every pop creates the same inventory state.
Player 1 should know which Totem was consumed and restore the protection that matters most.
After a normal offhand pop
If Player 1 was fighting normally with a combat item in the main hand and a Totem in the offhand, the offhand becomes empty after the pop.
Player 1 is now unprotected until another Totem is placed in a hand.
The first priority is usually:
Restore the offhand Totem
If Player 2 is still applying immediate burst pressure, Player 1 may then select the Hotbar Totem and become double handed.
After a double-hand pop
If Player 1 was holding a Totem in both hands, Java Edition consumes the main-hand Totem first.
The offhand Totem remains.
Player 1 still has active protection, but the Hotbar Totem reserve is now empty.
The next priority is usually:
Refill the Hotbar Totem
This rebuilds the ability to double hand again after the next dangerous exchange.
After repeated pressure
If multiple Totems have been consumed in quick succession, Player 1 may need to restore both the active hand protection and the Hotbar reserve.
Trying to do every inventory action while Player 2 is still directly pressuring Player 1 can create another free damage window.
In that situation, creating space can be part of Totem Management.
Fast hands are much less useful when Player 1 has to search the entire inventory for the next Totem.
A good inventory layout makes reserve Totems:
In Crystal PvP, reserve Totems are commonly kept around the central area of the inventory.
This reduces long cursor movements from one edge of the inventory to another and makes the next available Totem easier to identify.
The exact pattern can vary, but consistency matters more than creating a visually perfect inventory.
A good layout lets Player 1 develop a repeatable movement:
Open inventory → move toward known Totem area → hover nearest Totem → hotkey
As the fight continues, that layout can break down.
Totems disappear, other items move and the remaining reserve can become scattered.
If the next refill starts requiring large or uncertain cursor movements, Player 1 should consider disengaging briefly and reorganizing the inventory.
This is not wasted time.
A short reset can prevent a much longer emergency refill later.
Totem Management contains two related but different skills.
Reaction
Player 1 must first recognize that protection needs to be restored.
That includes:
Execution
Once Player 1 knows exactly what needs to happen, the remaining problem is mechanical.
That includes:
A player can be mechanically fast but still react slowly.
Another player can recognize the situation immediately but lose time through inaccurate cursor movement or inconsistent hotkeys.
Consistent Totem Management requires both.
This is also why practicing only one fixed inventory position is limited. It can improve a specific movement, but it does not fully train the ability to recognize and solve an unpredictable refill state.
A Totem prevents the lethal hit, but it does not make Player 1 safe.
After activation, the Totem restores only a small amount of immediate health before its recovery effects begin working.
Player 2 can still create another lethal damage window.
The first few actions after a pop should therefore be based on the current threat rather than on a fixed habit.
A useful priority order is:
Possible defensive actions can include changing position, using an Ender Pearl, blocking a crystal position or otherwise disrupting Player 2's follow-up.
The exact response depends on the fight.
The important principle is that Player 1 should not treat the Totem animation as permission to continue attacking without checking the new state.
D-Taps show why Totem Management matters so much in Crystal PvP.
The D-Tap uses two crystal damage instances across consecutive damage windows.
Against a single active Totem, the first crystal can pop Player 1 and the second can arrive before Player 1 has time to complete a normal inventory refill.
This creates two main defensive goals.
Before the first pop
If Player 1 recognizes the danger early enough:
Double hand
The main-hand Totem can absorb the first lethal hit while the offhand Totem remains available.
After the first pop
Player 1 should not assume the exchange is finished.
The priority becomes surviving or disrupting the follow-up window.
Depending on the exact position, that may mean keeping the remaining Totem active, moving out of the crystal setup, pearling, blocking the placement or otherwise denying Player 2 the second clean explosion.
Totem Management does not make D-Taps harmless.
It reduces the chance that the first pop automatically creates an unprotected second damage window.
Knowing the correct sequence is not enough if the movement breaks down under pressure.
MCTrainer separates Totem Management into two focused training modes:
| Mode | What happens | Primary skill |
|---|---|---|
| Totem Reaction | After the GO signal, locate the required Totems and get a Totem into both hands | Recognition, reaction and execution |
| Totem Speed | Memorize two marked Totem positions before the round, then double hand as quickly as possible after GO | Pure refill execution and muscle memory |
In Totem Reaction, the player cannot rely on the same memorized preview used by Totem Speed. The drill places the focus on reacting to the signal, locating the Totems and completing the protection state.
In Totem Speed, two inventory positions are shown before the round. When the round begins, those marked positions become Totems. The player already knows where the Totems will be and can focus on executing the refill as quickly and cleanly as possible.
Both drills finish only when a Totem is held in both the main hand and offhand.
That makes the two modes useful for different weaknesses:
The MCTrainer PvP Benchmark Report found large descriptive differences between the earliest and later run groups in both Totem modes.
Totem Reaction decreased from a median of 2,165 ms in the earliest run group to 1,028 ms in the later group.
Totem Speed decreased from 1,700 ms to 858 ms.
These comparisons do not prove that every player will improve by the same amount. Players who reach later run groups are also the players who continued practicing.
They do show why Totem training should be treated as a repeatable mechanical skill rather than a one-time personal best.
Play the Totem training
Join mctrainer.club on Minecraft Java Edition and open the Training modes.
Use Totem Speed to build the raw refill movement.
Then use Totem Reaction to test whether that movement still works when the Totem locations are not pre-memorized in the same way.
The goal is not only to produce one fast run.
The goal is to make the correct refill reliable enough that it still happens during a real fight.
| Mistake | What happens | Correction |
|---|---|---|
| No dedicated Hotbar Totem | Player 1 cannot double hand immediately and has no fixed refill target | Keep one Totem on a consistent hotbar slot |
| Waiting for the pop before thinking about safety | Player 1 starts the refill only after becoming vulnerable | Double hand before likely lethal burst damage |
| Staying double handed permanently | Player 1 gives up normal main-hand combat options unnecessarily | Use double handing when the danger justifies it |
| Dragging Totems manually | Refill requires more cursor movement and is easier to misclick | Hover the Totem and use the offhand or hotbar key |
| Using the scroll wheel for the emergency Totem | Player 1 can overscroll or lose the intended slot | Use a direct hotbar key |
| Scattered reserve Totems | Player 1 spends time searching the inventory | Keep Totems in a predictable, reachable inventory area |
| Reorganizing before restoring protection | The inventory looks cleaner while Player 1 remains vulnerable | Restore active protection first |
| Ignoring which hand popped | Player 1 refills the wrong slot or wastes inputs | Read the current main-hand and offhand state |
| Continuing offense immediately after a pop | Player 2 receives a free follow-up opportunity | Stabilize protection and position before re-engaging |
| Training only one memorized refill | The movement is fast only when the Totem is exactly where expected | Combine Totem Speed with Totem Reaction |
| Copying another player's keybinds exactly | The layout may conflict with Player 1's own movement and combat binds | Build a Totem bind around personal hand position and sequences |
Totem Management reduces the time Player 1 spends without protection.
That affects almost every high-pressure Crystal PvP exchange.
Good Totem Management can:
The difference is not simply how fast Player 1 can move an item.
It is how quickly Player 1 can move between the correct protection states while the fight continues around them.
A Totem only protects Player 1 while it is held in the main hand or offhand.
For Crystal PvP, Player 1 should keep an accessible Hotbar Totem in addition to the normal offhand Totem.
When rapid lethal damage is likely, Player 1 can select the Hotbar Totem and become double handed.
In Java Edition, the main-hand Totem is consumed first. The offhand Totem therefore remains available after the first pop, reducing the vulnerability to immediate follow-up damage.
After a Totem pops, Player 1 should:
Read the current protection state → restore the missing active Totem → rebuild the Hotbar reserve → return to the normal combat item when stable
Consistent Totem Management depends on four core ideas:
The first Totem keeps Player 1 alive.
Totem Management keeps Player 1 ready for what comes next.
Learn how to hit an opponent against a wall and place a Cobweb in their head position to trap them during the resulting knockback.
